 ⭐ Featured
Aloo Paratha
Stuffed whole-wheat flatbread with spiced potato filling — the quintessential Punjabi...
Tamil Nadu breakfast — foxtail millet puttu — high in fibre.
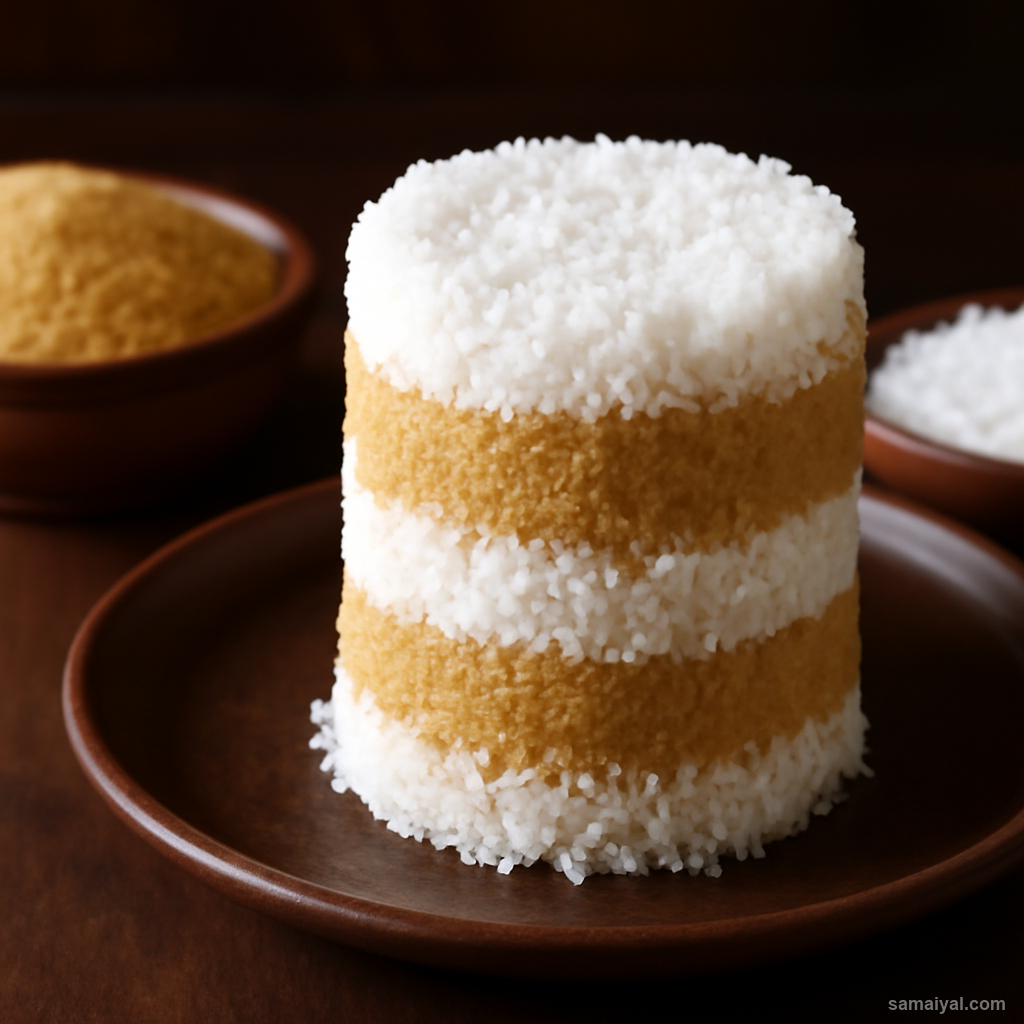
About Thinai Puttu: Thinai Puttu is the foxtail millet puttu — a fibre-rich Tamil traditional breakfast. Puttu (steamed cylinder of grain flour layered with grated coconut) is one of the foundational South Indian breakfast preparations. The thinai (foxtail millet) version is a healthier alternative to the traditional rice puttu — same beautiful technique, dramatically more nutrition.
Gather ingredients: 2 cups thinai (foxtail millet flour — available at specialty South Indian groceries; if you only find whole foxtail millet, grind to fine flour at home), 1/2 cup freshly grated coconut (fresh is essential; desiccated produces dry inferior puttu; frozen-thawed works), salt to taste, water for moistening flour.
The critical equipment: Use a puttu maker (puttu kutti) — a tall cylindrical vessel with a perforated disc at the bottom and a base for steaming. Available at Indian groceries and Kerala-Tamil specialty shops.
If no puttu maker: Use a steamer with a clean cotton cloth lining the basket — the puttu will be flat-shaped rather than cylindrical, but the flavour is identical. Or shape the moistened flour-coconut mixture into balls and steam.
Make the puttu mixture: Place the 2 cups thinai flour in a wide bowl. Add salt to taste — about 3/4 tsp. Sprinkle water gradually (about 1/2 cup total) while rubbing the flour with your fingertips. Goal: moist crumbly texture — not wet, not dry.
The consistency test: When you press a handful firmly, the flour should hold its shape briefly. When you drop it, it should crumble apart easily. This is the signature puttu texture — moist but crumbly.
Adjust if needed: If too dry, add 1 tbsp more water and rub. If too wet (rare), add 1-2 tbsp more flour. Cover and rest for 5 minutes — moisture distributes evenly through the flour.
Prepare the steamer: Fill the bottom vessel of the puttu maker with water. Bring to a rolling boil over high heat.
Layer the puttu: Place the perforated disc at the bottom of the puttu cylinder. Add a layer of grated coconut (about 1 tablespoon). Add a layer of thinai flour (about 3 tablespoons). Repeat — coconut, flour, coconut, flour — ending with a coconut layer on top.
Do not pack: The layers should be loose, not tightly packed. Tight packing prevents proper steaming.
Attach and steam: Attach the filled cylinder to the boiling base. Steam for 6-8 minutes over high heat.
Check doneness: Steam should flow freely from the top of the cylinder — this signals the puttu is fully cooked. If steam doesn't flow, the puttu is still cold inside.
Push out the puttu: Switch off the heat. Use a long thin object (chopstick or back of a wooden spoon) to push the puttu out from the top — it slides out as a beautiful intact cylinder.
Serve immediately: Thinai puttu is at peak when warm. Crumble slightly into pieces with your fingers before eating.
Serve with kadala curry: The most traditional Kerala-Tamil pairing — black chickpea curry. The combination is iconic.
Serve with coconut milk: Drizzle warm coconut milk over the puttu. Add a small amount of jaggery or sugar — produces a sweet variation.
Serve with banana and sugar: A simple and beloved variation — mash a ripe banana onto warm puttu, sprinkle with brown sugar.
A nutritional note: Foxtail millet provides exceptional fibre, complete protein, iron, calcium, B vitamins. Naturally gluten-free. Far more nutritious than rice puttu.
⭐ Featured
Stuffed whole-wheat flatbread with spiced potato filling — the quintessential Punjabi...
 ⭐ Featured
Thin crispy rice-lentil crepe filled with spiced potato masala — the iconic South...
 ⭐ Featured
Steamed fermented rice cakes served with tangy lentil vegetable soup — South India's...

Crispy ring-shaped lentil fritters with fluffy interior — a South Indian must-have with sambar.
Comments & Tips
Be the first to share your experience with this recipe!
Leave a Comment