 ⭐ Featured
Aloo Paratha
Stuffed whole-wheat flatbread with spiced potato filling — the quintessential Punjabi...
Whole wheat paratha stuffed with spiced pumpkin — the Bihar autumn breakfast
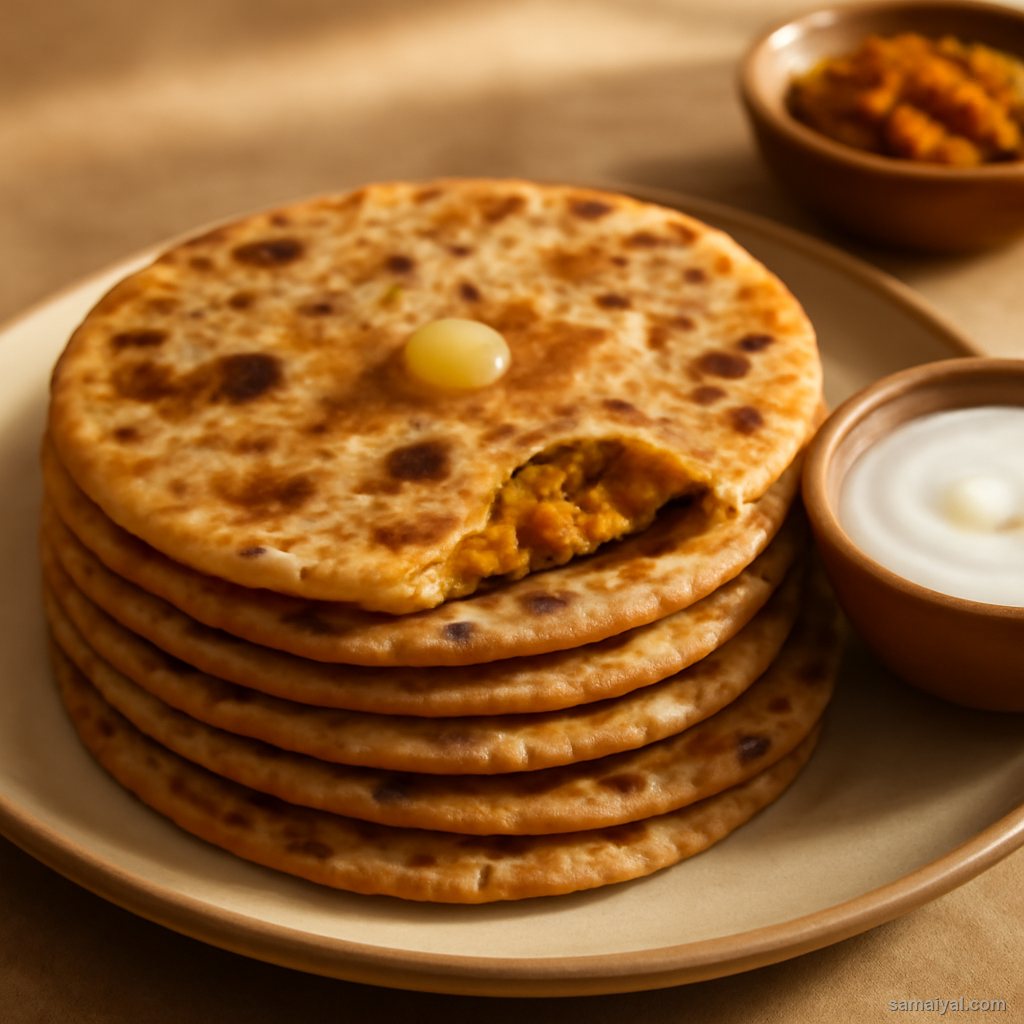
About Bihari Kaddu Paratha: Kaddu Paratha is the Bihar autumn breakfast — grated pumpkin stuffed into whole wheat paratha. The dish is seasonal: pumpkins are at their peak in October-November in Bihar, and kaddu paratha appears at every Bihari breakfast table during this time. The technique is more demanding than ordinary paratha, but the result — soft pumpkin filling encased in golden ghee-crisped wheat — is genuinely worth the effort.
Choose the right pumpkin: Use 300g of red pumpkin (kaddu) — the deep orange-fleshed variety. The flesh should be firm and dense — not watery. Avoid butternut squash (too sweet, too watery for proper paratha) or watery pumpkins.
Prepare the pumpkin: Cut the pumpkin in half. Scoop out and discard the seeds. Peel the skin using a sturdy knife or peeler.
Grate the pumpkin: Use the medium holes of a box grater. Grate the pumpkin flesh into long fine shreds. You should get about 2 cups of grated pumpkin from 300g flesh.
The critical squeeze-dry step: This is the most important step in the entire recipe. Place the grated pumpkin in a clean kitchen towel or several layers of muslin cloth. Twist the cloth and squeeze hard for 1-2 minutes — extract every drop of moisture you can. Wet pumpkin will tear the paratha during rolling and make stuffing impossible.
The dryness check: After squeezing, the grated pumpkin should look matte and feel barely moist. If you can squeeze water out by pressing — keep squeezing until no more comes out.
Discard the squeezed water: The pumpkin water can be used in soups or discarded. The dry pumpkin shreds should sit in a wide bowl ready for seasoning.
Measure the cumin: Use 1 tsp whole cumin seeds. Toast briefly in a small dry pan over medium heat for 30 seconds until fragrant, then crush coarsely between your fingers or in a mortar.
Season the pumpkin: To the squeezed pumpkin add the toasted crushed cumin, 1/2 tsp turmeric powder, 1/2 tsp red chilli powder, 1 tsp salt, and 1 tbsp finely chopped fresh coriander.
Mix the filling: Use a spoon or your hands to combine everything thoroughly. The pumpkin should turn a beautiful pale yellow-orange with visible flecks of cumin and chilli.
Let the filling rest: Set aside while you make the dough — about 15 minutes. Some moisture may be drawn out by the salt; pour off any liquid that accumulates.
Make the dough: In a wide bowl combine 2 cups whole wheat flour (atta) and 1/2 tsp salt. Whisk briefly to distribute the salt.
Add water gradually: Have 3/4 cup warm water ready. Pour about 1/2 cup over the flour. Mix with a fork at first, then your fingers as the dough comes together. Add 1-2 tbsp more water as needed.
Knead to a soft smooth dough: Knead for 5-7 minutes on a clean work surface. The dough should be soft and pliable — easier to roll than chapati dough since you need to stretch it around a stuffing.
Rest the dough: Cover with a damp cloth and rest for 15 minutes. Resting relaxes the gluten and makes the dough much easier to roll.
Check the filling moisture: Before assembly, squeeze the filling gently again to remove any moisture that has been drawn out by the salt. Excess moisture is the enemy of stuffed paratha.
Divide the dough: Pinch off lemon-sized portions of dough — about 60g each. You should get 8-10 balls. Roll each between your palms into a smooth ball. Keep them under the damp cloth as you work.
The critical stuffing technique: Take one dough ball. Flatten between your palms into a round disc about 8cm wide. Place 2 tbsp of pumpkin filling in the centre.
Seal carefully: Bring the edges of the disc up around the filling, like making a small purse. Pinch the edges firmly to seal the filling completely inside. Roll between your palms into a smooth ball again — there should be no visible seams or holes.
The seal is critical: Any weak point in the seal will tear during rolling and the filling will escape, ruining the paratha. Pinch firmly.
Dust with flour: Dust the sealed ball lightly with flour. Place on a clean work surface dusted with flour.
The critical gentle rolling: Use a rolling pin to roll the stuffed ball into a flat disc, about 16-18cm wide and 4-5mm thick. Roll gently and slowly — pressing too hard will tear the dough and force out the filling.
The rolling rhythm: Roll a few short strokes, then turn the disc 90 degrees, then roll again. Turning ensures even thickness and prevents the stuffed ball from sticking to the surface.
If it tears: If a small tear opens, dust with flour and pinch closed. Continue rolling carefully. Larger tears mean the filling was too wet — make a note to squeeze harder next time.
Use a heavy flat pan: Use a wide flat heavy pan or non-stick frying pan. Cast iron tawa works perfectly for traditional Bihari paratha.
Heat the pan: Place the pan over medium heat. Wait 2 minutes for it to get evenly hot.
The critical first cook: Slide the rolled paratha onto the dry hot pan. Cook for 30 seconds — small bubbles should appear on the surface and the bottom should be lightly speckled.
Flip and add ghee: Flip the paratha. Drizzle 1 tsp ghee around the edges and on the surface. The ghee will sizzle and start to crisp the paratha.
Flip again: Cook for another 1-2 minutes. The bottom should turn deep golden with crispy patches. Flip once more, drizzle 1/2 tsp more ghee on this side.
Final cook: Cook for 1-2 more minutes until both sides are deep golden brown with crispy patches and the paratha is cooked through.
Keep warm: Stack cooked parathas on a plate covered with a kitchen towel — the residual heat keeps them warm and soft.
Work in batches: Continue rolling and cooking each paratha. Try to keep each paratha the same size and thickness for visual consistency.
Serve immediately: Kaddu paratha tastes best within 30 minutes of cooking, while still warm and the ghee is shining.
Serve with yogurt: The traditional pairing is plain whisked yogurt with a pinch of salt and roasted cumin powder — the cooling yogurt balances the spiced paratha beautifully.
Serve with pickle: Add a small portion of mango or lemon pickle for contrast. The tang of pickle cuts through the rich paratha.
For a substantial breakfast: Pair with hot tea or chai. The combination of warm spiced paratha, cool yogurt, sharp pickle, and hot tea is a complete Bihari breakfast.
A seasonal note: Pumpkins peak in October-November in Bihar. Eating kaddu paratha during this season connects you to the agricultural rhythm of the region. In other seasons, the dish is still excellent but the pumpkin character is most vibrant in autumn.
Leftover storage: Cooled parathas keep at room temperature for 6-8 hours. Refresh by warming briefly in a hot dry pan for 30 seconds per side. They go soft after refrigeration but reheat well in a pan.
⭐ Featured
Stuffed whole-wheat flatbread with spiced potato filling — the quintessential Punjabi...
 ⭐ Featured
Thin crispy rice-lentil crepe filled with spiced potato masala — the iconic South...
 ⭐ Featured
Steamed fermented rice cakes served with tangy lentil vegetable soup — South India's...

Crispy ring-shaped lentil fritters with fluffy interior — a South Indian must-have with sambar.
Comments & Tips
Be the first to share your experience with this recipe!
Leave a Comment